Thursday, November 17, 2011

New additions

I'm taking advantage of that precious and all-too-fleeting window when the toddler's and baby's naps overlap to put some time into the blog and my Etsy shop. Thanks to some tough decisions about de-stashing I added a couple of items to the shop, including some fat eighths from the new Little Apples collection from Moda. (I told you that I made some tough decisions -- it's not easy to part with such cuteness!). I also reduced the prices on a few other items that have been in my shop for a few months and will be adding some vintage items soon.


And as far as the more important new addition to the household, we welcomed our second daughter a few weeks ago. She is, of course, precious, and thankfully doing an OK job of napping in her bassinet. It sure is different going from one child to two, but in a very, very good way.

Saturday, October 29, 2011

Homemade Halloween: DIY Piglet costume

Last year I was determined from early on that the toddler would go as Piglet for Halloween. The officially licensed retail Piglet costumes sell for over $30, and there was no way I spending that much money (yes, I'm cheap) for what amounted to a photo op since she was still too young to trick or treat.

Plus, it's more fun to make these things on your own, right? I mean, right? OK, it's definitely more time-consuming, but I put together what I thought was a pretty darn cute costume for about $8. I needed three things: pink footie pajamas, a striped sleeveless sweater, and Piglet ears on a headband.

I decided to go with Disney's version of the sweater (that is, pink with horizontal stripes) and not the classic E.H. Shepard version (which usually is blue or sage green), just so the costume would be more recognizable.


The pj's and sweater were fairly easy although I did have to make a few thrift store runs throughout October to find pieces I could work with. [Note: thrifting a costume is not a last-minute project in my experience; it takes planning and persistence. I think of it as a treasure hunt!]


Not a great photo, I know. I removed the sleeves from the sweater and used a pink fabric pen to color in the white stripes.

The ears required more work. I started with a $1 pair of bunny ears from the thrift store.

This is a shot of the back; the front of the ears had shiny white polyester "inner ears" for lack of a better term. The ears got their shape from a loop of thin wire. I experimented with trying to pinch the wire into more of a pig shape but finally decided more deconstruction was needed:
  1. I used the toddler's Piglet plush toy as my guide and traced one of the ears onto paper to make a template.
  2. With a seam ripper I removed the white fabric from the pink "outer ears," exposing the support wires. Using my template as a rough guide, I trimmed the pink fabric leaving about 1/2" all around.
  3. With wire clippers, I snipped the support wires where they connected to the headband closer to the center, straightened the wires out, and then snipped the excess so there would be some support going almost to the tip of each ear.
  4. I cut 2 ear shapes out of light pink crafting felt backed with fusible web, and cut 2 more ear shapes from hot pink crafting felt about 1/4" smaller also backed by fusible web.
  5. I positioned the light pink felt ear shapes with the fusible web facing down on the wrong side of each outer ear, sandwiching the support wires, and fused in place.
  6. Then I positioned the hot pink ear shapes in place, and pinched the excess outer ear fabric over the light pink felt and under the edges of the hot pink felt. Once the contours were right and the raw edges were hidden I fused the hot pink felt in place.
Ta-dah!

Piglet ears, front and back.

Trust me when I tell you, the toddler was the cutest darn Piglet you've ever seen. But then again, I am biased.

Sunday, September 11, 2011

What's your fave machine quilting thread?


I did not manage to finish the baby quilt before my friend's shower last weekend. Being pregnant myself, the effects of work, home, husband and toddler meant that I tend to be fairly wiped out by 9:00 pm, pretty much the only time during the week I can sew. Instead I tried to focus on preparing my minimal contributions to the shower itself, including a bunting banner I wanted to make. Make it I did with hours to spare, and it turned out pretty nicely I think.

But back to the quilt. I pieced the backing from my stash yesterday, and fused/topstitched the label just a little bit ago during the toddler's* nap. Forgetting that basting a quilt takes a certain amount of time and effort, I was getting ready to run to my local quilt shop for machine quilting thread and possibly some material for the binding. As I was brushing my hair, I thought, What's the rush? You're not going to start quilting it today, you might as well put some research into this. I have some experienced machine quilters I can consult, and I have this blog floating around on the interwebs.

So if there's anyone out there reading this who cares to chime in, I'd love to hear what your favorite machine quilting thread is. This is just a utilitarian baby quilt that I'll probably quilt with straight lines. I've done some machine quilting in the past with little attention paid to the type of thread I used. In fact, I'm embarrassed to admit how much thread has made its way into my collection because I wasn't paying attention. Seriously, how did I end up with so much cotton/poly Coats & Clark? Actually, I know why -- it's cause I was shopping the sales at the big box stores. To be fair, I do have a good amount of Mettler in my collection, too. I'll tell you what though, once you go Presencia you'll never go back. That stuff just glides through my old machine like buttah.

So even though this isn't an heirloom quality quilt, I do want the materials to be of quality. The fabric I'm using is all good quality, I got 100% cotton batting, I've used good thread for piecing. I'd hate to undermine it all with crap quilting thread. I mean, the quilting might be crap, but at least the thread will be good.


And speaking of the fabric, a few weeks ago I found just the right stuff for the sashes/borders and cornerstones. When I got a look at the selvages, I was not surprised -- Moda and more Moda. I picked a sunny yellow gingham printed on the bias from Sweetwater's Sunkissed collection for the sashes/borders, and may just have to grab another yard or two for my stash. I love that it's on the bias.

For the cornerstones, I bought a fat quarter of what turned out to be from Fig Tree & Co., which I didn't know till I got it home. Absolutely no surprise there -- I love her palette. I just can't figure out exactly which collection it's from, Fig & Plum or Strawberry Fields, because the selvage isn't long enough. I'm thinking of using it for the binding, so I really need it to match what I've already got. Again, if anyone out there knows based on the photo...


*I really need to come up with a cute pseudonym for her. One more thing for the To Do List.

Thursday, September 1, 2011

Yet another coffee sleeve tutorial

I know there are tons of great tutorials out there on how to make coffee cup sleeves, but I thought I'd add my own into the mix. Just in case it's useful to someone.

I made this coffee cup sleeve for my dear friend's birthday a few months ago -- she deserves much more than this, but this will have to do until I make her that heirloom queen-size quilt.

I started by picking out a couple of fabrics, in this case, some cotton sateen prints from Amy Butler's Soul Blossoms collection. Love them.

I used a Starbucks cardboard coffee sleeve as my template and traced it onto a thin piece of cardboard. If I planned to make a lot of these I'd have used template plastic, but cardboard is great for my purposes. 

I cut my template with an extra 1/8" all around -- I just eyeballed it. No need to get out a ruler for this. Although the sleeve is reversible, you may want to mark the template with "front" and "back" if it matters which fabric will be on display more often.

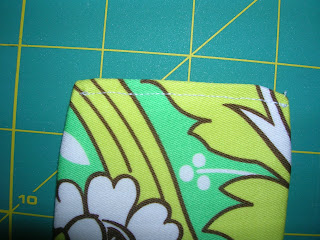
I traced around the template and cut my sleeve front and back from the two fabrics with a scant 1/4" seam allowance all around, making sure to flip the template to get the reverse shape for the back since the sleeve isn't completely symmetrical.

Here are the front and back after being cut out.

Next I cut out my lining. This version was actually my second attempt, so I applied what I'd learned from my first version. In the first version, I tried using thin cotton batting along with a scrap of blackout curtain lining left over from an old project. It was just too thick with two layers between the cotton sateen, which is a heavier weight than quilter's cotton. So I figured the blackout curtain fabric would suffice. Besides, my friend likes to feel the warmth from the cup through the sleeve -- if anything, I was afraid it was going to be too insulated for her. As you can see, I used the actual Starbucks sleeve as the template for this step and cut just inside the line. I knew from my first attempt that I didn't want the lining caught in the seams.

I centered the lining on the wrong side of my backing fabric, pinned carefully, and then thread basted them together. Leave your knots on the right side of the backing fabric for easy removal later on.

I layered my front and back fabrics right sides together and used pins to line up the corners just right. When I was satisfied with the alignment, I pinned through all layers and stitched along my marked line. I left open the end that was going to be the flap that gets tucked under when the sleeve is wrapped around a cup.


I removed the pins but left in the thread basting, and carefully turned the sleeve right side out through the opening. I pressed the sleeve to make sure the lining was lying nice and flat and not getting bunched up in the seam allowance. Then I folded in the seam allowances on the open end, pinned, and topstitched to close it up. I think I tried to catch the lining in the stitching if possible, but didn't worry too much about it being "free floating." I knew it was nice and snug inside the sleeve. Now it was safe to remove the thread basting.

For some reason, the only velcro I had on hand was something I'd bought for a paper craft, so it had adhesive on it and is not intended for use with fabric. But because I'm lazy and I knew that this was not something that would probably see much washing machine action, I used it anyway. I attached one half of the velcro to the front fabric on the end that would get tucked under, and the other half on the back fabric of the opposite end. Because of the sticky adhesive, I hand stitched an X through each piece of velcro using a big embroidery needle that I could throw away. Actually, I think I used two needles because they got so gunked up. I don't recommend attaching your velcro this way, but you work with whatcha got.

Ta-dah! 

And that, my friends, is how I made my coffee sleeve. From all indications, it is out in the world and holding up just fine.

Tuesday, August 30, 2011

I have to brag somewhere...

... and I can't do it on Facebook since the intended recipient (or rather, mother of the intended recipient) would see my status update and the surprise would be ruined. So I have to do it here. The baby quilt top is pieced. Of course, as I referred to it before, it is super-simple and any quilter worth her salt should have been able to put it together within a few hours. So I guess I shouldn't brag too much. Besides, now comes the hard part -- the quilting! Which I'm not sure I'll be able to finish before the baby shower this weekend, although I suppose I should try. Ah, for an entire, uninterrupted day of sewing!

Saturday, August 20, 2011

First things first

I've gotten by with just one big and one small acrylic ruler for years now. Recently I've found myself wanting a 12 1/2" square ruler, so I took a glance at the price tag when visiting my local quilt shop recently. Over $20! Eek. I love supporting my LQS but I just may have to locate a 40% JoAnn coupon and get a ruler there.

But first, I've got a super simple baby quilt I want to make in the next 12 days. Seems like it should be do-able, but nothing goes as quickly as it should when you work full-time and come home to a husband and toddler. A toddler who apparently refuses to nap longer than 90 minutes on the weekends. Which brings today's blog post to an end.